Part One: This Is the Easiest Homemade Cheese You’ll Ever Make
If you’ve got milk and vinegar in your kitchen, you’re just a few steps away from making your own fresh cheese. That’s right — no fancy tools, no rennet, no special cultures. This is the simplest cheese recipe you’ll ever find, and the results are seriously good.
You’ll end up with a soft, mild cheese that you can spread on toast, crumble over salads, or eat straight from the fridge. This cheese is ready in less than an hour, and it’s a game-changer if you love fresh, natural food.
Why This Recipe Works
- Two ingredients: Milk + vinegar = cheese.
- No special skills needed. If you can heat milk, you can make cheese.
- Fully customizable. Add herbs, butter, salt — or keep it plain.
- Healthy and clean. No preservatives, additives, or fillers.
Whether you’re trying to cut costs, avoid processed food, or just try something fun, this recipe is for you.
What You’ll Need
Ingredients:
- 1.5 liters (6 1/3 cups) whole milk – Use full-fat for creamier results. Low-fat milk also works.
- 2 tablespoons vinegar – Apple cider vinegar or white vinegar both work.
- Salt – To taste.
- Optional:
- 50g melted butter (¼ cup) for extra richness
- 1 tablespoon dried herbs (like Provencal mix, oregano, or thyme)
Step-by-Step Instructions
1. Heat the Milk
Pour the milk into a heavy-bottomed pot. Heat it over medium heat until it reaches about 190°F (88°C) — that’s just before it boils. Stir occasionally so it doesn’t stick or burn.
2. Add Vinegar
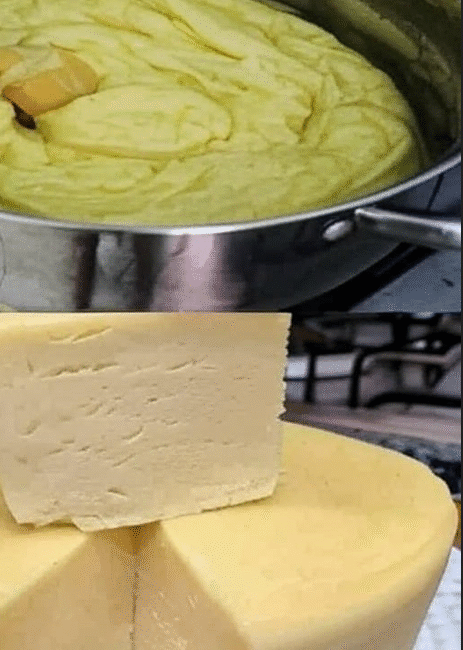
Remove the pot from the heat. Add vinegar and stir gently. You’ll see the milk start to curdle — it will separate into curds (solid) and whey (liquid). Let it sit for 5–10 minutes.
3. Strain
Line a colander with cheesecloth or a clean towel. Pour the mixture in and let the whey drain. Press lightly to remove more liquid, depending on how soft or dry you want the cheese.
4. Season and Shape
Add salt, herbs, or butter (if using). Mix gently. Form the cheese into a ball, block, or just leave it crumbly.
5. Chill
Put the cheese in the fridge for at least 1 hour. It will firm up and become easier to slice, crumble, or spread.
Why You’ll Love This
- Takes less than 1 hour start to finish
- Uses common kitchen ingredients
- Easy to adjust the flavor
- Great for snacks, salads, sandwiches, pasta, and more
- Cheaper than store-bought cheese
- No waste — even the leftover whey can be reused!
This simple cheese recipe is proof that good food doesn’t need to be complicated. But we’re not done yet…
Part Two: What to Do With Your Fresh Cheese
Now that you’ve made your own cheese, here’s how to store it, use it, and take it to the next level.
How to Use Your Homemade Cheese
- On bread or crackers – Add olive oil or honey for extra flavor
- In salads – Crumble it like feta
- In pasta or rice dishes – Adds creaminess
- In wraps, omelets, or scrambled eggs
- On pizza – Use it like ricotta or soft goat cheese
- As a dip – Blend with olive oil, garlic, or herbs
Storage Tips
- Keep in a sealed container in the fridge
- Use within 3–4 days
- Want to keep it longer? Freeze it — just know the texture may change slightly
Bonus: Don’t Toss the Whey
The liquid left over is whey — and it’s full of protein and nutrients. You can:
- Add it to smoothies or protein shakes
- Use in bread dough, pancakes, or muffins instead of water
- Stir into soups or sauces
- Water your garden with it!
Final Thoughts
This homemade cheese is simple, fast, and delicious. All it takes is milk and vinegar. You don’t need to be a chef — just follow the steps, and you’ll be amazed at what you can make in your own kitchen.
Ready to try it? You’ll never look at store-bought cheese the same way again.