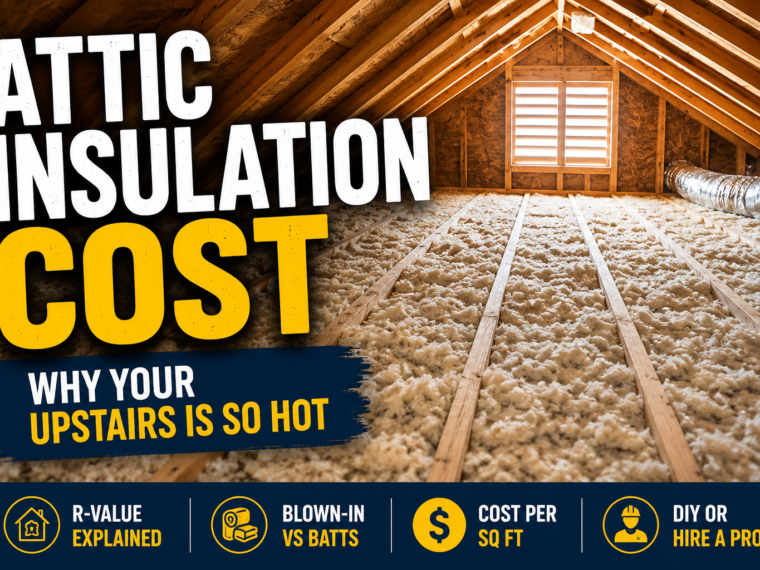
On a hot afternoon, the upstairs of an average American home can sit 8 to 10 degrees warmer than the living room directly below it. Same thermostat. Same air conditioner. Same house. Most people respond by cranking the AC lower, buying a bigger unit, or just giving up on the spare bedroom from June to September.
Here’s the part that surprises people: in the majority of these houses, the air conditioner is working fine. The problem is sitting a few feet above the ceiling, in a space almost nobody looks at. An attic on a sunny day can reach 130-150°F. If there isn’t enough insulation between that oven and your bedroom, the heat comes straight down through the ceiling all evening long — long after the sun has set.
The fix is usually attic insulation, and it’s one of the few home upgrades that quietly pays you back every single month. Let’s go through how to tell if it’s your problem, what it actually costs, and the one step most homeowners skip that makes the whole job work better.
## Why the Upstairs Gets So Much Hotter
Three things are stacking against your second floor at the same time.
– **Heat rises.** Whatever warm air is in the house naturally collects at the top.
– **The attic radiates downward.** A superheated attic doesn’t just sit there. It radiates heat through the ceiling into the rooms below, which is why upstairs bedrooms stay warm hours after sunset.
– **Ductwork often runs through that attic.** If your air handler and ducts sit in a 140-degree space, the cold air is losing its chill before it ever reaches the vent.
Insulation doesn’t cool anything. What it does is slow the transfer of heat, so the attic’s temperature stops bleeding into your living space. That’s why adding it can make the upstairs feel dramatically different without touching the AC at all.
## How to Tell If Your Attic Insulation Is the Problem
You don’t need an energy audit to get a strong first read. Grab a flashlight and a tape measure, and look into the attic hatch.
1. **The joist test.** Look across the attic floor. If you can clearly see the top of the wooden floor joists poking above the insulation, you’re low. Joists are typically 8-10 inches deep, and most climate zones want considerably more than that.
2. **Measure the depth.** Push a ruler straight down into the insulation. Blown-in fiberglass or cellulose generally needs somewhere in the range of 14-20 inches to hit the R-38 to R-60 the U.S. Department of Energy recommends for most attics. Under 10 inches almost always means there’s room to improve.
3. **Look for gaps and thin spots.** Insulation compressed by stored boxes, pushed aside by an electrician, or missing entirely around the hatch is extremely common.
4. **Winter clues count too.** Ice dams on the roof edge, or snow melting off your roof faster than your neighbor’s, both point at heat escaping through the ceiling.
5. **The room-to-room test.** If one upstairs room is consistently worse than the others, that’s usually a localized insulation or duct issue, not a whole-house AC issue.
If two or three of those ring true, insulation is very likely your bottleneck.
## Air Sealing Comes First (The Step Everyone Skips)
Real talk: this is the part I wish someone had told me before I ever thought about insulation. Insulation slows *radiant and conductive* heat. It does almost nothing to stop *air* moving through holes. And your ceiling is full of holes you can’t see — recessed light cans, bathroom fan housings, plumbing stacks, the gap where the chimney passes through, the attic hatch itself, and every spot where a wire was fished through a top plate.
Blowing 16 inches of fluffy insulation over an unsealed ceiling is like putting a thick sweater over a shirt full of holes. It helps, but you’re leaving a lot on the table.
Air sealing means going up there first with canned spray foam for the small gaps, fire-rated caulk or sealant around flues and chimneys, and weatherstripping plus a rigid foam cover on the attic hatch. It’s cheap — often $100-$300 in materials if you do it yourself — and it makes every dollar of insulation that follows work harder. Any reputable insulation contractor will include air sealing in the quote. If one doesn’t mention it at all, that tells you something about the quote.
## What Attic Insulation Costs
Prices vary a lot by region, attic access, and how much old material has to come out first, so treat these as typical ranges to sanity-check a quote rather than a firm number.
– **Blown-in fiberglass or cellulose:** roughly $1.50-$3.50 per square foot installed. For a 1,000-square-foot attic, that’s commonly $1,500-$3,500.
– **Fiberglass batts:** roughly $1.00-$2.50 per square foot installed. Cheaper, but only performs well if the attic floor is open, even, and easy to work in.
– **Spray foam:** roughly $3.00-$7.00 per square foot. The premium option, usually reserved for sealing the roof deck in homes where the ductwork lives in the attic.
– **Removing old, damaged, or rodent-contaminated insulation:** often adds $1-$2 per square foot.
Two things push a quote up fast: a low-slope roof that a crew can barely crawl into, and existing insulation that has to be vacuumed out. Two things pull it down: an easy walk-up attic, and simply topping up over what’s already there, which is perfectly acceptable as long as the existing material is dry and clean.
## Should You DIY It?
Blown-in insulation is genuinely DIY-able. Most big-box home improvement stores lend a blower machine free with a bulk bag purchase, and two people can top up an average attic in a long Saturday. Materials for a 1,000-square-foot attic often land in the $500-$900 range, so the savings are real.
That said, be honest about the conditions. Attic work in summer means 130-degree heat, a respirator, kneeling on joists, and no floor to catch you if you step wrong. Go early in the morning, take frequent breaks, and don’t do it alone. If your attic has knob-and-tube wiring, signs of a roof leak, or evidence of rodents, stop and bring in a pro — those need to be resolved before anything gets covered up.
## How Fast Does It Pay Back?
Heating and cooling is the single largest slice of most household energy bills, and an under-insulated attic is usually the biggest leak in the building. Homeowners who go from minimal insulation to a properly sealed and insulated attic often report meaningful drops in their summer cooling and winter heating costs — enough that a mid-range job frequently pays for itself within a few years, then keeps saving after that.
It’s also worth checking current federal energy-efficiency tax credits and your local utility’s rebate programs before you book the work. Insulation and air sealing are among the most commonly incentivized home upgrades, and the paperwork is usually simple. Rules change year to year, so confirm what’s active before you sign anything.
## The One Thing to Do Tonight
Don’t call anyone yet. Open the attic hatch, shine a flashlight across the floor, and see whether you can spot the tops of the joists. That ten-second look tells you more than any contractor’s sales pitch will, and it turns your next conversation from “how much to insulate my attic?” into “I’ve got about six inches up there and I want to get to R-49 — what’s your price to air seal and blow it in?”
Same job. Very different quote.