Forsythia is one of spring’s most cheerful shrubs — those bright yellow blooms bursting out before a single leaf appears. And because it’s so vigorous and beautiful, it makes perfect sense that you’d want more of it. Growing forsythia from cuttings is absolutely possible, and when you do it right, you’ll have healthy new shrubs for free.
But here’s the thing: most people get it wrong. They cut at the wrong time, prepare the stem incorrectly, or put it in the wrong rooting environment. Then they wonder why nothing ever takes root. Let’s fix that.
Why Most Forsythia Cuttings Fail
The number one reason forsythia cuttings fail is timing. People take cuttings whenever they think of it — often right after the plant flowers in spring — without realizing that the wood at that stage is either too soft or not in the right growth phase for reliable rooting.
The second major mistake is skipping rooting hormone. Forsythia will sometimes root without it, but your success rate drops significantly. It’s a small step that makes a big difference.
Third is the environment. Cuttings need consistent moisture and warmth, but not soggy conditions. Too wet and they rot. Too dry and they shrivel before roots can form.
Understanding the Three Types of Cuttings
Forsythia can be propagated using three types of cuttings, each taken at a different time of year:
Softwood cuttings are taken in late spring to early summer, when the new growth is still tender and flexible. These root quickly but need careful attention because they’re more prone to wilting and rot.
Semi-ripe cuttings are taken in midsummer, when the base of the new growth has begun to firm up but the tip is still soft. This is the sweet spot — flexible enough to root well, firm enough to handle stress.
Hardwood cuttings are taken in late autumn or winter, when the plant is fully dormant. These are the most forgiving, slowest to root, but very reliable if done correctly.
For beginners, semi-ripe cuttings in midsummer tend to give the best balance of ease and success rate.
How to Take the Cutting
Choose a healthy stem that has no flowers or buds on it — you want the plant’s energy going into roots, not blooms. Look for stems that are about 4 to 6 inches long with several sets of leaves.
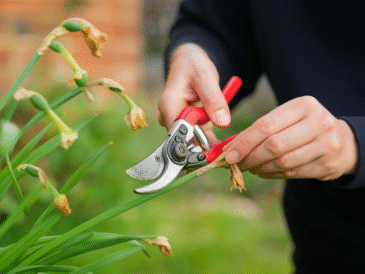
Use clean, sharp pruning shears or a knife. This is important: a clean cut reduces the chance of disease and gives the stem the cleanest possible surface for rooting. Cut just below a leaf node (the point where a leaf meets the stem).
Take your cutting in the morning when the plant is fully hydrated. Avoid cutting during the hottest part of the day.
Preparing the Cutting
Once you have your stem, it’s time to prep it for rooting:
Remove all leaves from the lower half of the cutting, leaving just two or three sets of leaves at the top. Too many leaves mean the cutting loses water faster than it can absorb it before roots form.
If your cutting has any flower buds, pinch them off. Again — you want root energy, not flower energy.
Make a very shallow wound (called wounding or scarification) at the base of the cutting by gently scraping the bottom inch of the stem with a knife on one or two sides. This exposes more of the inner tissue, which roots more readily.
The Best Rooting Mix
Don’t use regular garden soil or potting compost on its own — it holds too much moisture and can rot the cutting. Instead, use a well-draining rooting mix:
A 50/50 blend of perlite and peat moss works very well. You can also use a mix of coarse sand and perlite. The goal is a medium that stays moist but drains freely and doesn’t compact around the stem.
Fill a small pot or tray with your rooting mix and water it until evenly moist (but not dripping).
Using Rooting Hormone
Rooting hormone is not strictly required, but it dramatically improves your success rate. You can find it at most garden centers as a powder, gel, or liquid.
For powder: dip the wounded base of the cutting into the powder, then tap off any excess. Too much hormone can actually inhibit rooting rather than help it.
For gel: dip and hold for a few seconds, then insert directly into your rooting mix.
Planting and Creating the Right Environment
Use a pencil or stick to make a small hole in your rooting mix before inserting the cutting — this prevents the hormone from being wiped off as you push it in. Insert the cutting about an inch to an inch and a half deep, and firm the mix gently around it.
Now you need to create a humid environment. Place a clear plastic bag loosely over the pot, or use a clear plastic bottle with the bottom cut off as a mini cloche. This traps humidity around the cutting while still allowing some airflow.
Place your pot somewhere with bright, indirect light. Direct sun will overheat the cutting and dry it out. A warm spot (around 65–75°F / 18–24°C) is ideal.
Check the moisture of the rooting mix every few days. It should stay consistently moist but never waterlogged. Open the bag briefly now and then to allow fresh air in and check for any signs of mold or rot.
Checking for Roots
Patience is key here. Forsythia cuttings typically begin rooting within 4 to 8 weeks, though hardwood cuttings may take longer.
The best way to check is to give the cutting a very gentle tug after 4 weeks. If it resists, roots are forming. If it pulls out easily, give it more time and return it to the mix.
Another sign: new leaf growth at the top of the cutting usually means roots are establishing below.
Hardening Off and Transplanting
Once your cutting has a good root system, it’s time to wean it off the humid environment. Begin removing the plastic cover for a few hours each day, gradually increasing the time over a week or two. This process — called hardening off — helps the young plant adjust to normal conditions without shock.
After hardening off, transplant your rooted cutting into a pot with regular potting mix, or directly into the ground if the weather is suitable. Give it a sheltered spot for its first season before moving it to its permanent home.
Water regularly and protect from hard frosts until the plant is well established. Within a season or two, your cutting will be a thriving young forsythia shrub ready to put on its own springtime show.
One Last Tip
Label your cuttings with the date you took them. It sounds simple, but when you have multiple pots going or you’re trying different methods, it’s easy to lose track. Knowing when you started helps you gauge whether roots should have formed yet — and keeps you from giving up on a cutting that just needs a bit more time.
Forsythia is a generous, resilient plant. With the right technique and a little patience, you’ll have more of it than you know what to do with.