A single inch of rain falling on a 1,000-square-foot roof sends roughly 600 gallons of water sliding off your shingles and straight down the drain. That’s free, soft, chlorine-free water your garden would love — and most of us just let it go. A rain barrel system catches a share of that runoff and puts it to work, and setting one up is far easier (and cheaper) than most people assume. Here’s exactly what it costs, how to install one in an afternoon, and what you can realistically expect to save.
What a Rain Barrel System Actually Is
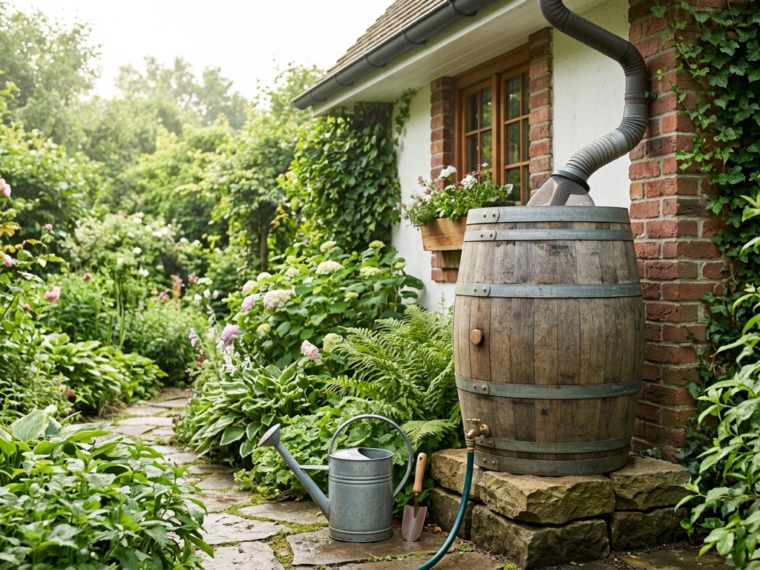
At its simplest, it’s a large container — usually 50 to 80 gallons — that sits under one of your downspouts and collects roof runoff. A diverter or open connection feeds rain into the barrel, a spigot near the bottom lets you fill watering cans or connect a hose, and an overflow port sends excess water away from your foundation once the barrel is full.
You can go basic or build it out:
- Single barrel: one downspout, one container. The classic starter setup.
- Linked barrels: two or more barrels connected with short hoses so overflow fills the next barrel in line.
- Elevated systems: barrels raised on a sturdy stand to add gravity pressure for drip lines and soaker hoses.
What It Costs to Get Started
This is one of the cheapest water projects you can do at home. Rough numbers:
- Ready-made rain barrel (50–65 gallons): around $80–$180 depending on style and material
- Downspout diverter kit: $20–$40
- DIY barrel from a food-grade drum: $20–$60 for the drum, plus about $20 in fittings
- Cinder blocks or a stand: $15–$40
So a tidy, ready-made setup lands around $120–$250 installed by you, while a DIY drum build can come in under $100. Many towns and water utilities also run rebate programs that knock $25–$100 off a barrel purchase — it’s worth a quick call to your local water department before you buy, because those programs are surprisingly common and rarely advertised.
Setting It Up in an Afternoon
Here’s the basic install, start to finish:
- Pick the right downspout. Choose one close to the garden beds you water most. The less distance you haul water, the more you’ll actually use the barrel.
- Level and raise the base. Set two or three rows of cinder blocks or a purpose-built stand on tamped, level ground. Height matters: every foot of elevation adds a little more water pressure at the spigot. A full 55-gallon barrel weighs over 450 pounds, so a solid, level base is non-negotiable.
- Install the diverter. Cut the downspout at the height marked in your kit’s instructions, fit the diverter in line, and run the short hose to the barrel’s inlet. Diverters automatically send water back down the spout once the barrel is full — much cleaner than an open-top setup.
- Screen everything. A fine mesh screen over any opening keeps out leaves, roof grit, and — most importantly — mosquitoes. No screen, and you’ve built a mosquito nursery.
- Set up the overflow. Attach a hose to the overflow port and aim it at least a few feet away from your foundation, ideally toward a garden bed or lawn that can soak it up.
Real talk: my first attempt at this sat the barrel directly on soft soil, no blocks. One good storm later, the full barrel had tilted into a lean that made the spigot almost useless and had me nervously eyeing 400+ pounds of water. Twenty minutes of prep with a level and some cinder blocks would have saved me an entire re-do. Learn from that one — build the base properly the first time.
How Much Money Does It Actually Save?
Let’s be honest instead of hyping it: a rain barrel will not slash your utility bill in half. Outdoor watering can account for a big share of summer water use, and a 55-gallon barrel that refills with every decent rain can offset a meaningful chunk of garden irrigation — often somewhere in the range of $35–$100 a year depending on your rates, climate, and how faithfully you use it. In areas with tiered water pricing or drought surcharges, the savings climb higher.
The payback period on a $150 setup is typically two to four years. But the money is only part of the value:
- Better water for plants. Rainwater is free of chlorine and softer than most tap water — container plants and seedlings especially respond well to it.
- Drought insurance. When watering restrictions hit, stored rainwater keeps your vegetable beds alive while lawns around you go brown.
- Less runoff and erosion. Capturing roof water reduces the surge hitting your yard and the storm drains during heavy rain.
Mistakes to Avoid
- Skipping the screen — mosquitoes will find an open barrel within days.
- Ignoring overflow — a full barrel overflowing against your foundation can cause the exact water damage gutters exist to prevent.
- Using a non-food-grade drum — barrels that held chemicals can leach residues into water you’re putting on edible plants.
- Letting it freeze full — in cold climates, drain the barrel and disconnect the diverter before winter, or ice can split the barrel and fittings.
- Drinking it — roof runoff isn’t potable. Garden use only, and many gardeners prefer to keep it for ornamentals and soil-level watering rather than spraying directly onto leafy greens close to harvest.
The One Upgrade Worth Doing First
If you take just one tip from this guide, make it this: raise the barrel higher than you think you need to. Most rain barrel frustration comes from weak flow — a spigot barely dribbling into a watering can. Two or three courses of cinder blocks (12–24 inches) transforms the experience, giving you enough gravity pressure to run a soaker hose slowly through a nearby bed. That’s the difference between a rain barrel system you actually use every week and a nice-looking container that quietly collects mosquito larvae behind the garage. Set it up right, keep the screen tight, and let your roof do the watering for you.